15 Pre-launch Chatbot Checks
3 minute read
Beginner
Designing chatbots is an iterative process, and with every launch or pilot, you learn new things and make changes. But if you are launching your chatbot for the first time with your users, here are 15 quick things you need to cross check,to ensure that you have checked in all basic things for your Bot. It shouldn't take you more than 15 minutes to ensure everything is in place.
- Disable the automated opt-in message on Gupshup. Every chatbot needs to take consent from it’s user to be able to further send messages. Gupshup sends a default message. But that generic message might confuse your users. Hence it is suggested to disable it on Gupshup and take consent on chatbot itself. To do this, click on your app on Gupshup, go to the Opt-ins tab, click on the Onboarding mechanisms dropdown arrow, and scroll down to disable the toggle.

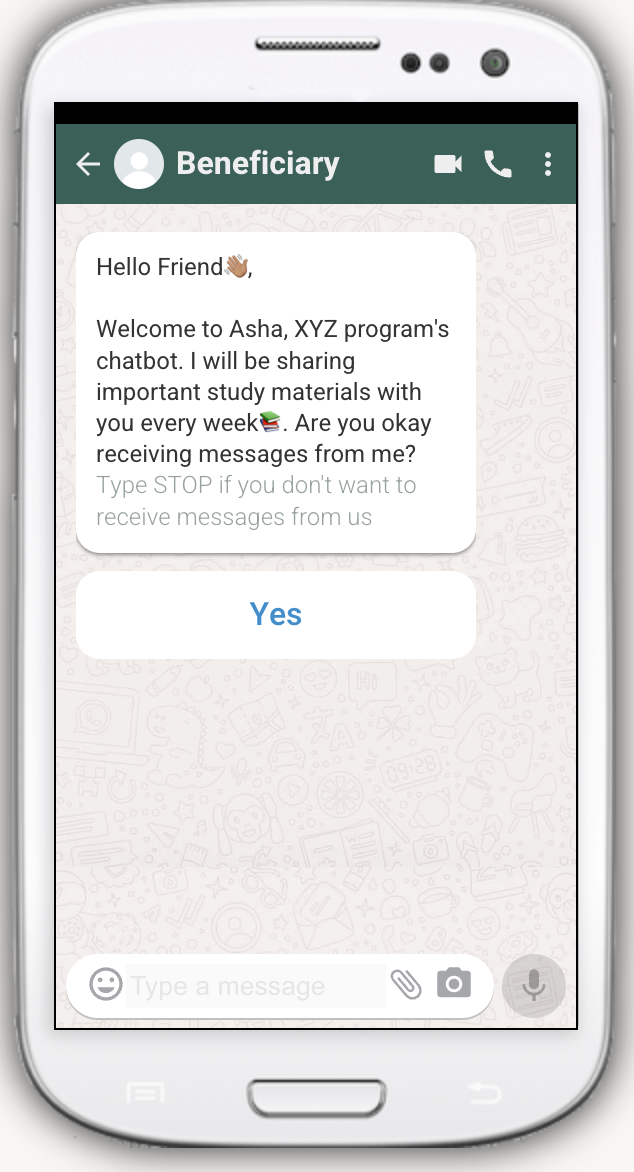
- The first message that a user receives upon joining the bot should be a consent message. Here are a few guidelines for designing your consent message:
- Clearly mention the name of the organization and the purpose of the bot.
- Clearly ask the user if they would like to receive messages from the bot (You can provide an interactive message with a "Yes" or 👍🏼 button).
- Users should have an option to opt out. Therefore, add the keyword in the footer through which users can opt out from the bot.
Other pointers to remember-
- It is recommended to have the first ever chatbot conversation initiated by the user instead of you broadcasting the message to users, even if you have user details. Broadcasting messages might lead to user reporting or blocking the bot, which can affect the overall health of the bot. Unless you have obtained user consent outside the bot (on your app or manually), the first message should always be user-initiated.
- Create a separate flow for users who type "STOP/ Opt Out" and add them to a collection. This will help you to reach out to them in future at least know how many of your users are opting out.
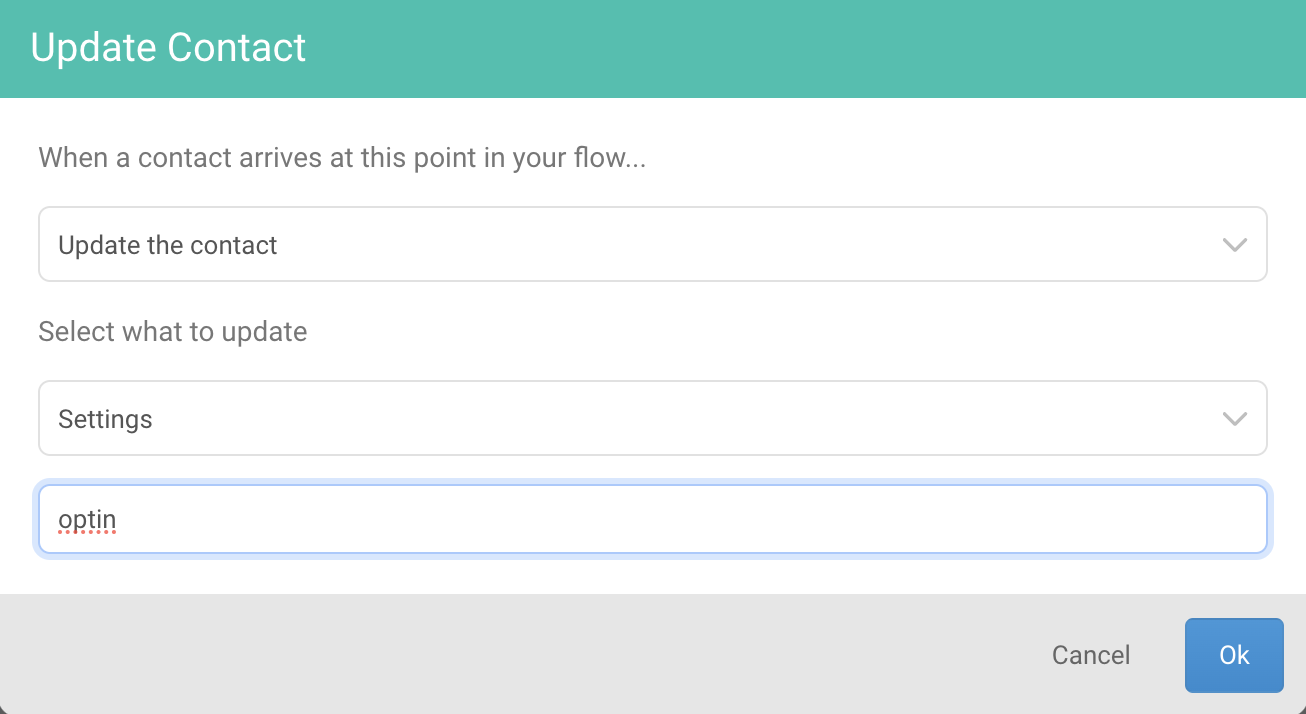
- Update the Opt-in settings post-user consent. It is mandatory to update a contact's settings with Opt-in after their consent.
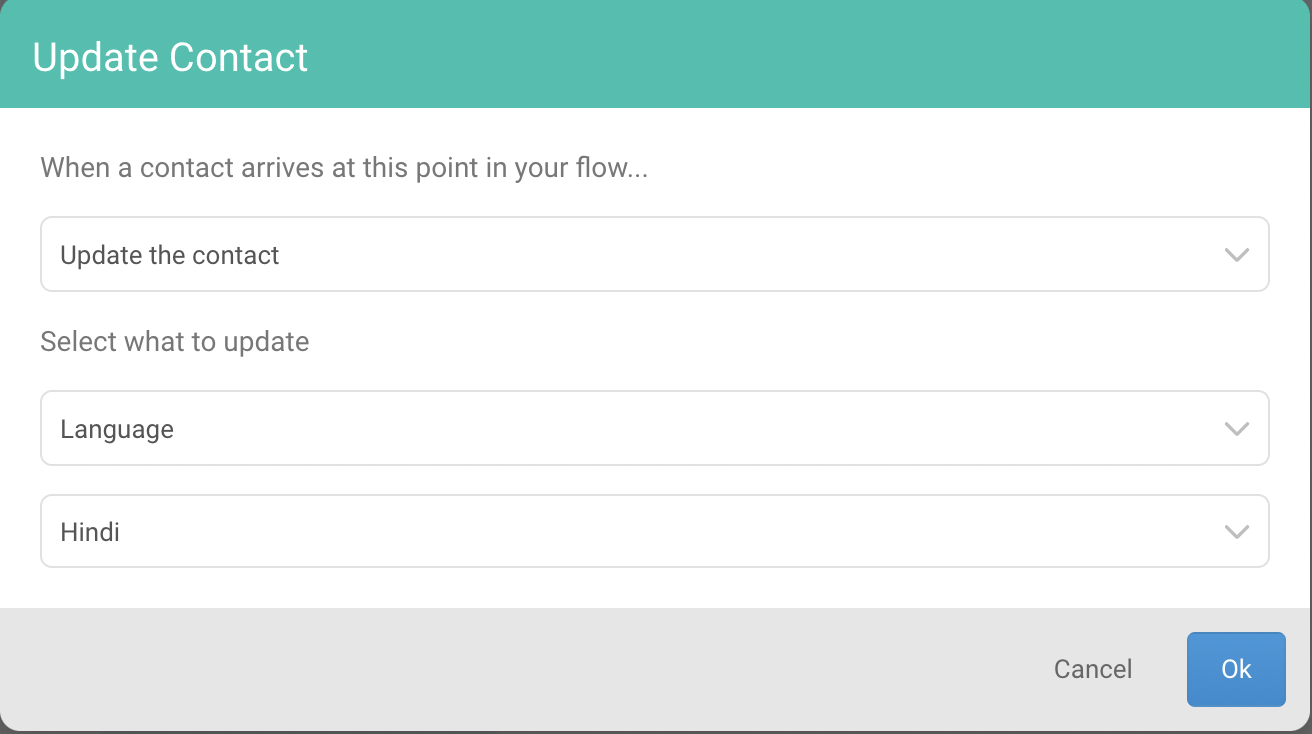
- Important user information collected during registration, such as Name, Language, Training group, City, etc., should be updated in the contact profile. This will be helpful for you to refer in any flow in future
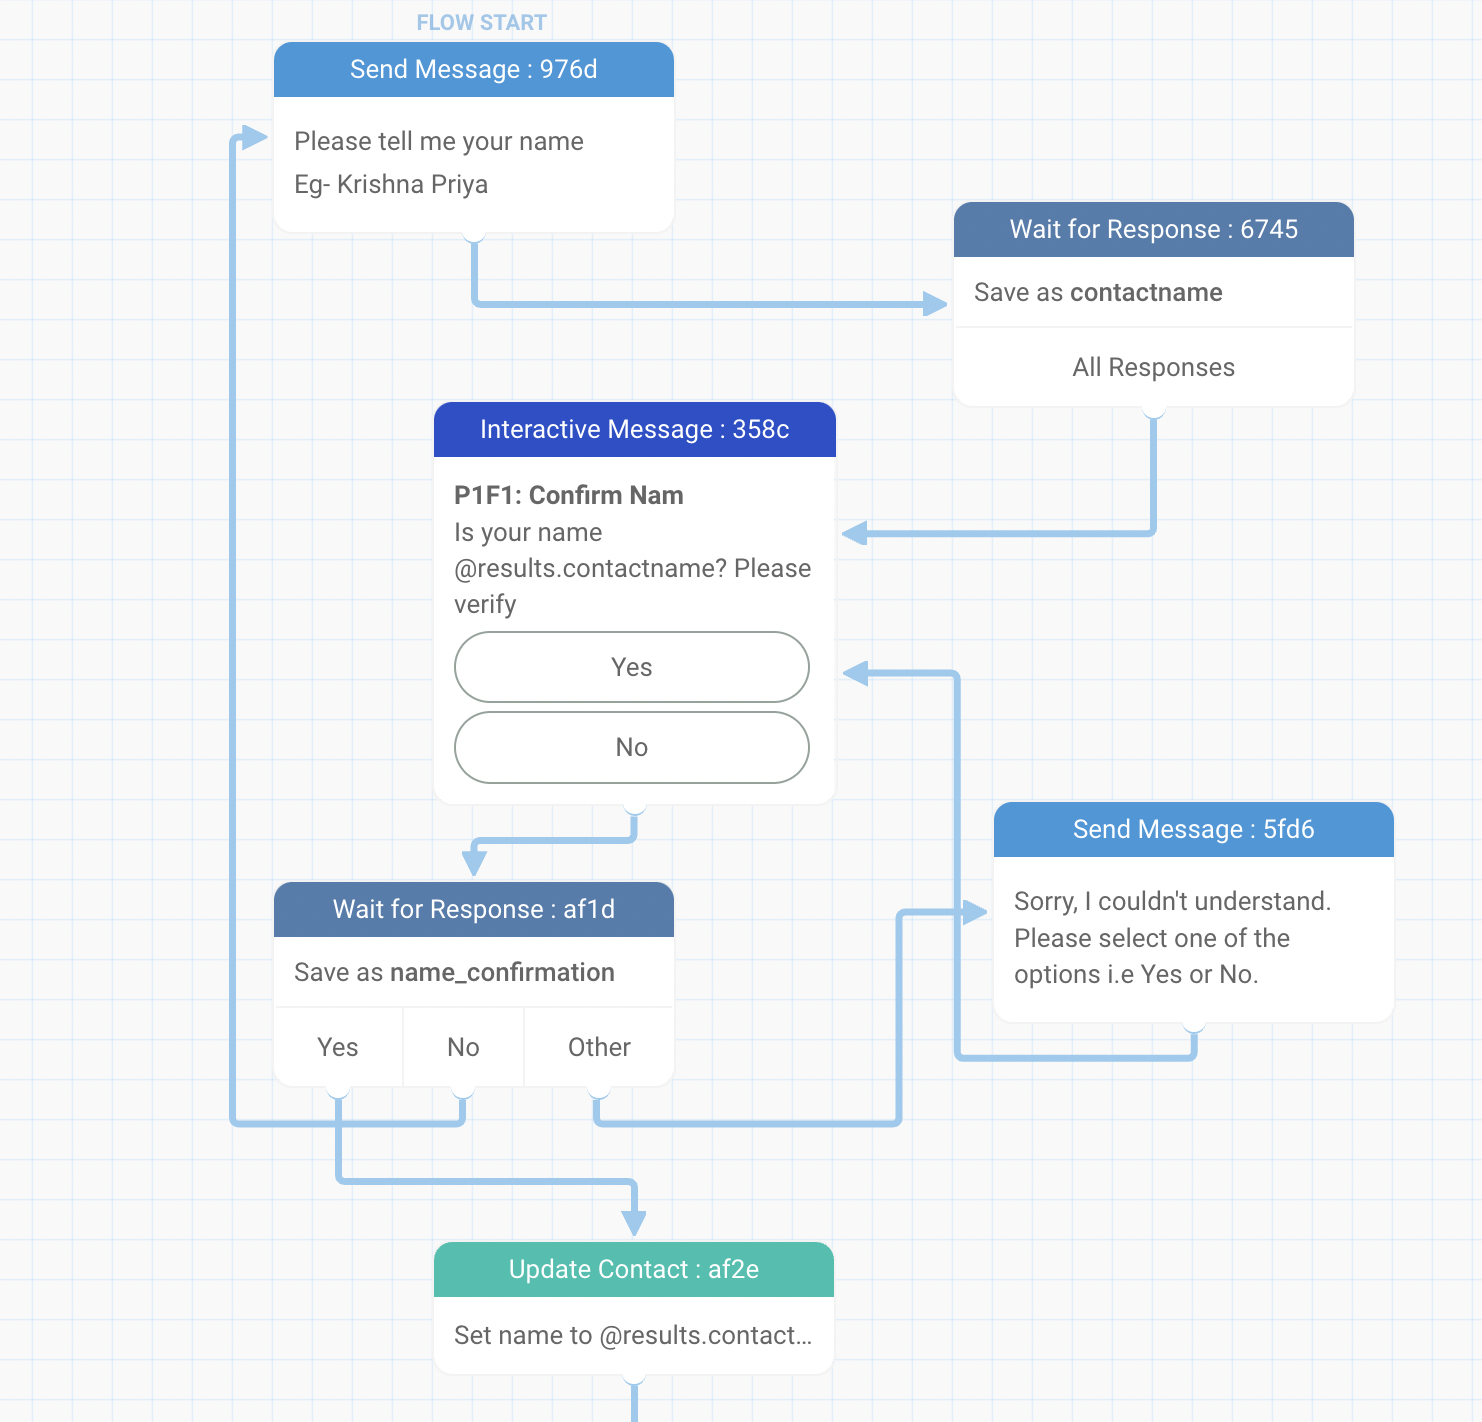
- Confirm key information (like Name, Language, etc.) which you would be using through out the bot, before updating the contact. Sometimes, users might enter incorrect information, which can impact the user experience throughout.
For example, sharing a name as "My name is Krishna Priya" instead of just "Krishna Priya" can lead to the bot referring to the user with the incorrect name every time. Additionally, a user choosing the wrong language preference by mistake might discourage them from using the bot.
But please remember that, there is a tradeoff that it adds another click in the process for the user. So pick the info you would like to confirm.
You can customize which flow you want to send to users who have come to your bot for the first time. You can update this new contact flow through Settings → Flows. If you haven’t set it, then users would get a pre-set new contact flow (by Glific) which might not be your preferred first flow for new users.
Add content in all nodes for all languages, if multiple languages are used for the bot.
Add users to relevant collections based on how you want to communicate with them in the future.
Use interactive messages wherever you want the user to choose from given options or when answers are predictable (e.g., grade, Yes/No, Gender, etc.).
If a flow is triggered from your end to the user, the first message of the flow should be an HSM/ Template message (because we don't know if the users are in the active session window or not).
Add labels for both outgoing and incoming messages for all the data you want to capture and check in the future.
Use appropriate names for Flows, Keywords, and Result names to make it easy to track them in the future.
Use emoticons, bold, italics, and media as needed. On a side note, Here is a blog written on writing the first chatbot script (along with some examples). Do give it a read!
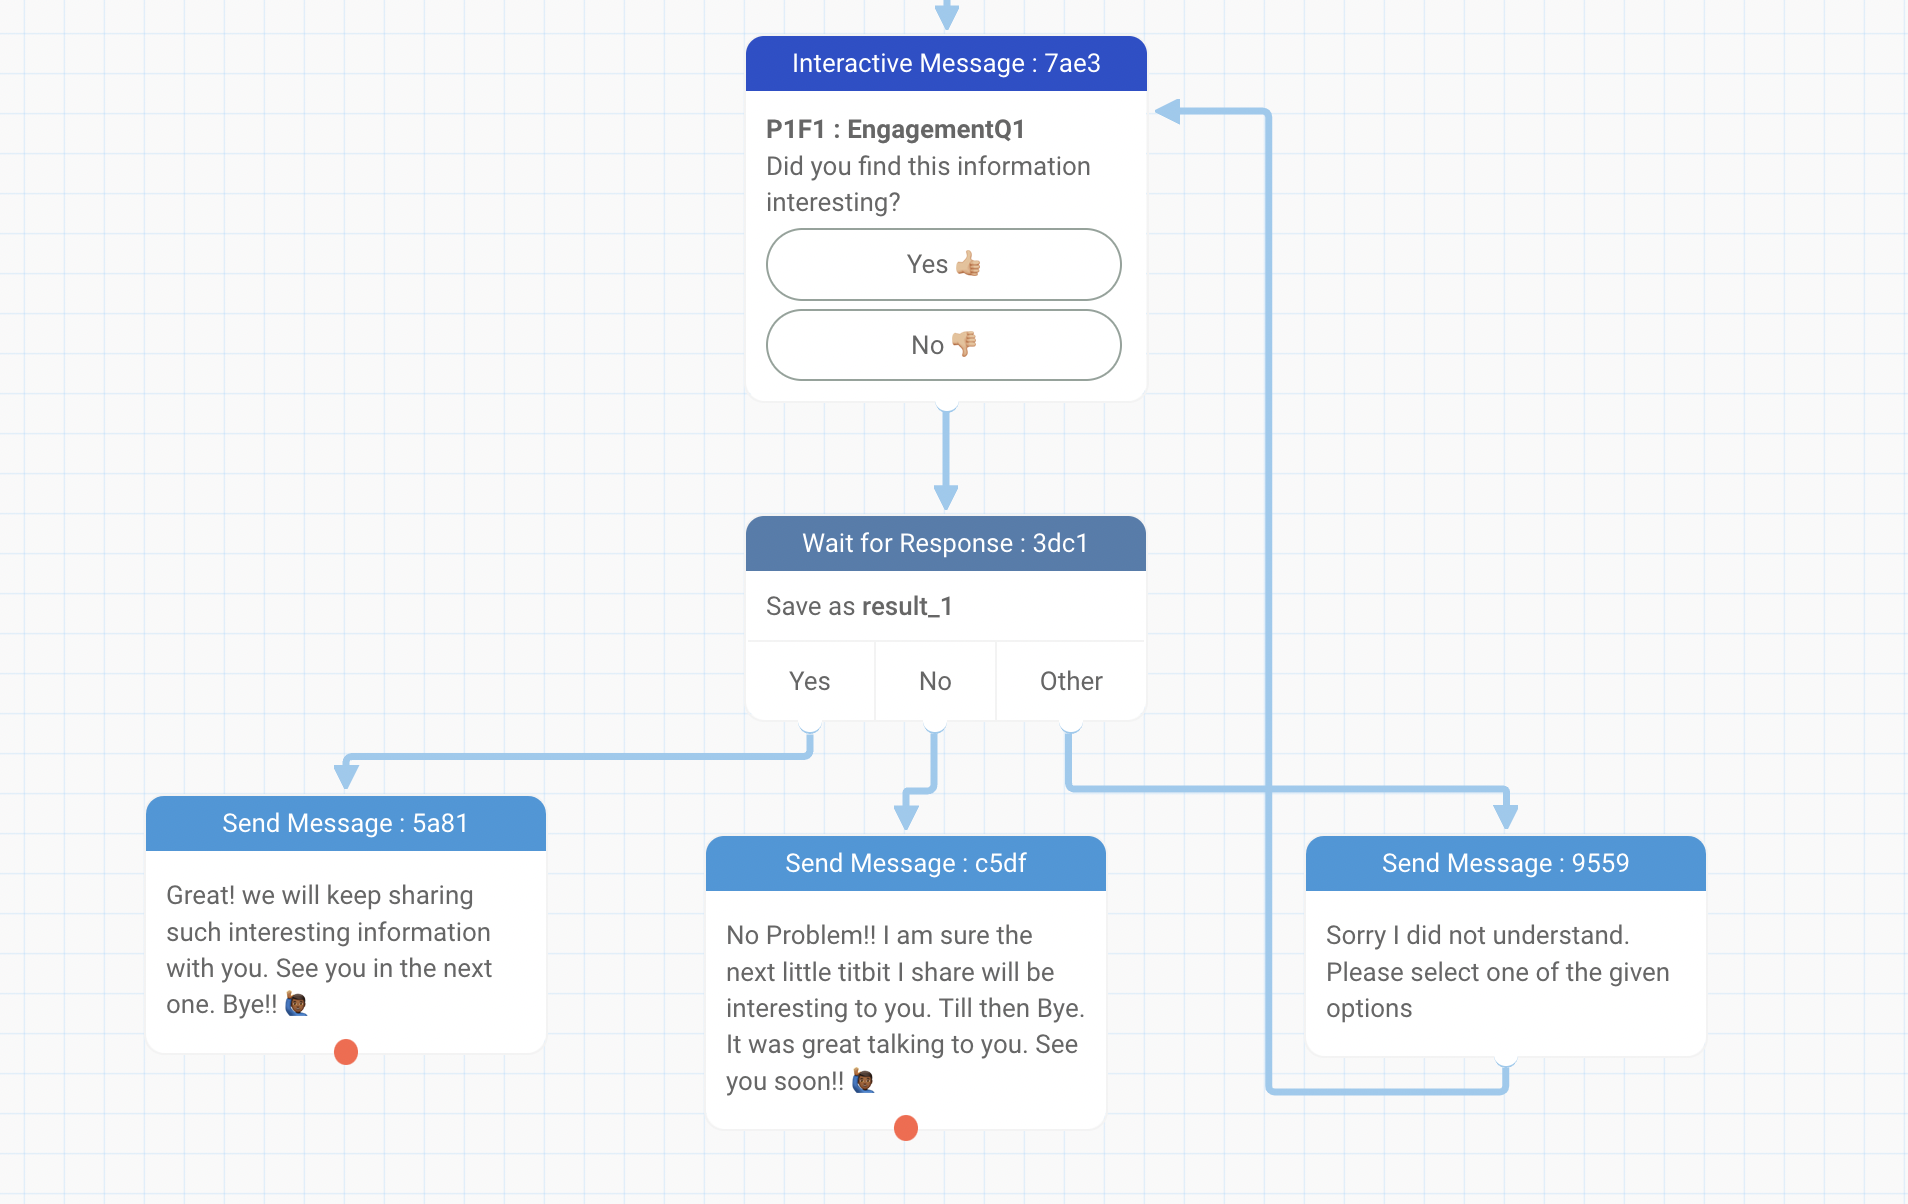
Ensure the user does not encounter any dead ends in the bot, especially in the case of interactive messages. Make sure there is also an option for the user to send free text apart from the button options you provide, and clarify what the user is expected to do. Connect the user's response back to the main question and wait for their response so the flow can proceed.
- Testing, Testing, Testing: Test the chatbot internally with at least 3 to 5 people on mobile phones before sharing it with actual users.